Throw Back Thursday

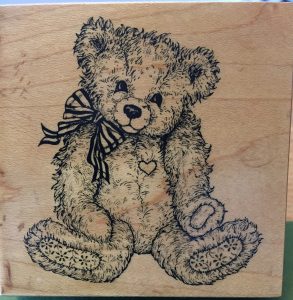
This little adorable teddy bear stamp is the first stamp I ever bought–the first stamp that started my card making / paper crafting journey. 19 years later I still love creating cards!


The stamp is from a company called Personal Stamp Exchange–nope it’s not Stampin’ Up!

Saturday Morning Stamp Club: Versamark Resist

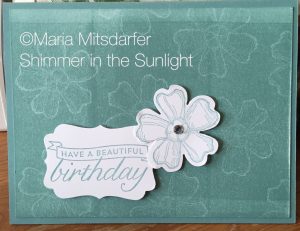
May’s Stamp Club we made this Have a Beautiful Birthday Card.  The technique is Versamark Resist.

Stamp onto card stock with Versamark.  Should dry pretty quickly.  If you are using glossy or coated paper, you will need to heat emboss.  Ink up your brayer and roll over cardstock.  The Versamarked images will “resist” the ink and show through on your card.


Stamps and Supplies used:

  • Birthday Blossoms Stamp Set
  • Lost Lagoon, Whisper White Card Stock
  • Lost Lagoon Ink
  • Whisper White Thick Card Stock
  • Rhinestones
  • Decorative Label and Pansy Punches
  • Brayer

Happy Stamping!  Keep Shining, Maria

Saturday Morning Stamp Club: Shaving Cream Technique

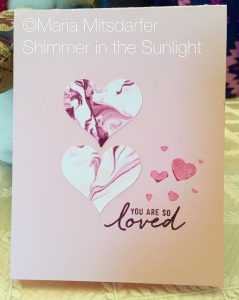
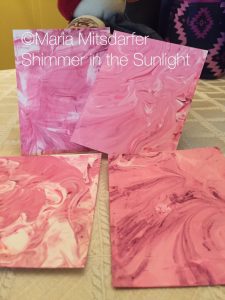
February’s Stamp Club project was customer requested–shaving cream technique!  Oh what fun!

Here’s what you need:

  • Cardstock
  • Ink refills
  • Squeegee
  • Shaving cream–the cheap stuff from the dollar store
  • Cuticle sticks
  • Something to protect your work surface–I use a self-healing cutting mat
  • Paper towels
  • Smock or apron to protect clothing and gloves to protect hands

Here’s how:

  1. Squeeze out a pile of shaving cream onto cutting mat
  2. Add drops of ink. Here I used Pink Pirouette, Rose Red and Cherry Cobbler
  3. Swirl around with stick, but not to much–you don’t want it to get muddy
  4. Place cardstock onto shaving cream
  5. Pull up and scrape shaving off with squeegee
  6. Buff any reminder shaving cream off with paper towel

Now, your beautiful cardstock is ready to be stamped, embellished or punch out got your project.

The “you are so loved” stamp is from Watercolor Wishes Card Kit.

Happy Stamping!  Keep Shining, Maria

A Whole Lot of Lovely Thank You Card

I love being a demonstrator with Stampin’ Up!  Every other month, demonstrators receive Stampin’ Success in the mail–it’s one of the demonstrator perks!!!

Many of our stamp club projects come directly from the demonstrator magazine.

Like this one for July’s Saturday Morning Stamp Club…

Here’s the actual card we made…

For the banners, you need 3 strip of cardstock.
1.  Whisper White 3-3/4 x 2
2.  Hello Honey 4-1/2 x 1
3.  Neutrals Color Collection DSP in Crumb Cake 5 x 1-1/2

Using the Banner Triple Punch you will cut out a notch on the end of each strip from the steps above. The Banner Triple Punch does all three sizes!!!!

Same card, different sentiment…

Don’t forget to stamp your envelope!

 Supplies:
A Whole Lot of Lovely Host Stamp Set
Crumb Cake Cardstock and Envelopes
Whisper White Cardstock
Calypso Coral Ink
Delightful Dijon Ink and Cardstock
White Bakers Twine
Neutrals Color Collection DSP Stack
Triple Banner Punch

You can shop for all these items and more at www.mariamitsdarfer.stampinup.net

Where do you get inspiration?  It’s all around us–if you keep an open heart and open mind!!!

Happy Stamping!  Keep Shining, Maria

Welcome to Shimmer in the Sunlight!

Why Shimmer in the Sunlight ?

Because I like things that are bright and shiny – whether it’s for a card, scrapbook page, craft project or jewelry to accentuate an outfit!

Because someone told me to “keep shining!” A little phrase that has had a big impact on my life — I think of it often!!

“Let your light shine before men, that they may see your good deeds and

praise your Father in heaven.” (Matthew 5:16)

Because I try to be positive and look on the bright side even when it’s raining!

“A cheerful heart is good medicine.” (Proverbs 17:22)

Because when I see, or think of Sunlight, I think of Jesus.  Jesus, who is the Lord and Savior of my Life.

“The Lord is my light and my salvation — whom shall I fear?” (Psalm 27:1)

Because I like things that are bright and shiny — oh, I already mentioned that!!!

Keep shining, Maria